
How do I avoid stretching product photos?
Your round jar should stay round. Group photos with the same aspect ratio before resizing. The ratio lock links the width and height fields using the first image, but the processor applies one common target rectangle to the whole batch. It does not calculate a separate fit box for each differently shaped source. Separate landscape, portrait, and square photos, or crop them to a consistent ratio first.
What formats and limits should I know?
The resizer accepts JPG, PNG, and WebP and can export JPEG, PNG, or WebP. Its maximum output edge is 3840 pixels. Targets above that edge are scaled down proportionally. JPEG fills transparent areas white; use PNG or WebP when you need transparency.
This upload flow does not publish a fixed input-megabyte or batch-count allowance. Browser memory still limits what you can process. Start with a small batch, especially on a phone, and reduce the batch if decoding or processing fails. Editing runs locally in the browser; this free tool does not require an account.
How do I batch resize to 600 × 400 pixels?
1. Add a small, consistent batch
Open the Bulk Image Resizer and click Choose Images. Select JPG, PNG, or WebP files. You can use Add Images for another file and remove an individual entry if it does not belong in this batch.
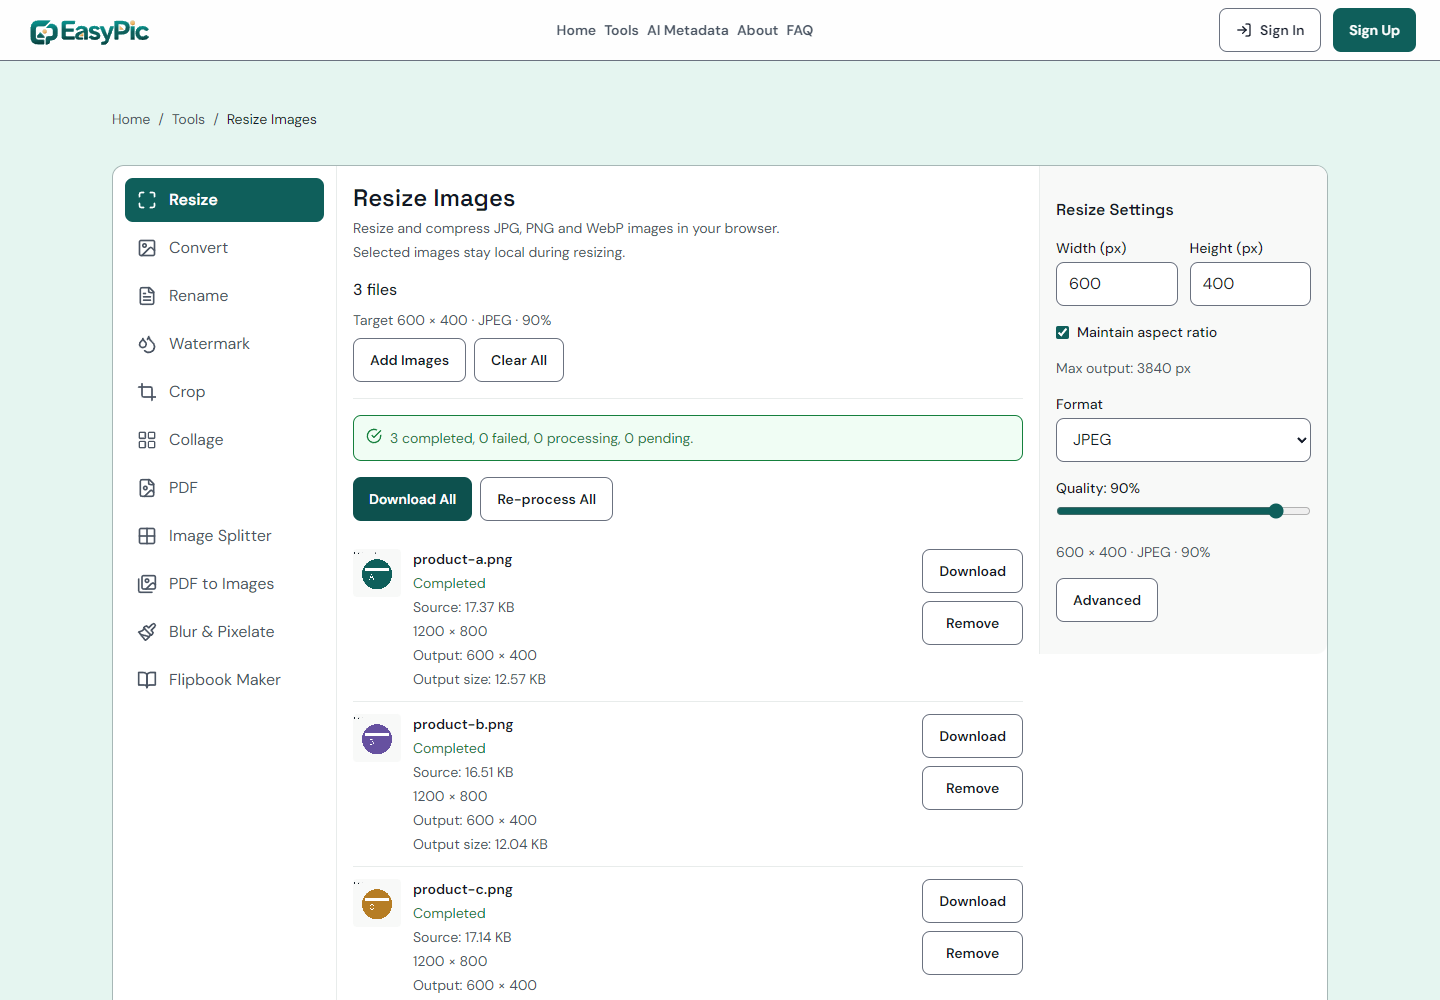
Wait until the list displays the source dimensions. The ratio lock needs the first source's dimensions to calculate the matching target value. Check that all three example sources show 1200 × 800 rather than mixing in a square image.
2. Set the dimensions and format
Keep Maintain aspect ratio checked. Set Width (px) to 600 and confirm that Height (px) becomes 400. If the numbers describe a different ratio, stop and check the first source instead of processing the whole batch.
Choose JPEG under Format. This walkthrough uses the displayed 90% quality setting. A higher quality value can retain more detail in a lossy format, but it does not guarantee a smaller file. PNG is useful when transparency matters; its quality setting is not a promised compression control.
3. Download and check the images
Click Resize. Review the completion status and each entry's output dimensions. Use Download All for a ZIP, or the file's Download button for one result. Unzip the batch before handing the images to another application.
Check one representative file at its real display size. A smaller preview can hide soft lettering, jagged edges, or a stretched product. Compare the circular shape with the source and verify the dimensions in an image viewer. Keep the original files so you can try another target without repeatedly recompressing a JPEG.
What did the downloaded JPEGs show?
We used three synthetic product images, A, B, and C. Each is a 1200 × 800 PNG with a circular product shape. The target is a 600 × 400 JPEG: the same 3:2 ratio, at half the source width and height. These are test illustrations, not customer photos.
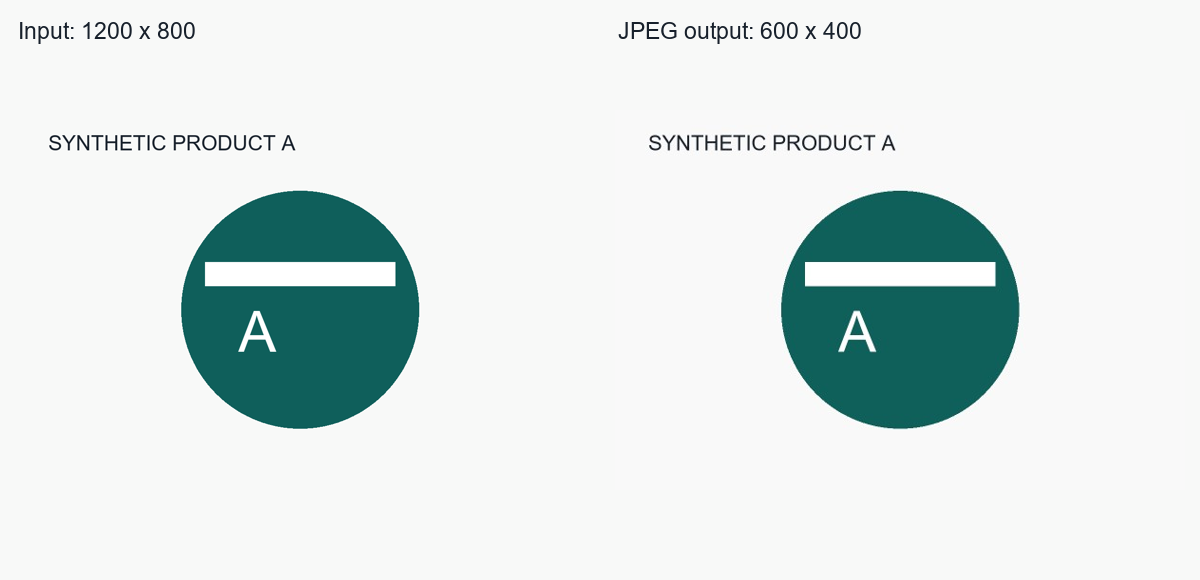
We processed the files in the browser tool. All three downloads decoded as JPEG and measured 600 × 400 pixels. Other sources can produce different file sizes or visual quality.
FAQ
Can I mix portrait and landscape photos?
You can select them, but the current processor uses the same target rectangle for the batch. To avoid stretching, split them into groups with matching ratios or use the Image Cropper to prepare a consistent shape first.
Will resizing remove transparency?
JPEG has no alpha channel; this resizer fills transparent areas white for JPEG output. Choose PNG or WebP when you need transparency and inspect the downloaded result.
Can I change only the format?
Yes. For a PNG batch that does not need a dimension change, follow the PNG conversion guide instead. The converter keeps the source dimensions.
What should I check before publishing product images?
Verify dimensions, shape, readable labels, and the output format. If the images will become a document, use the ordered Images to PDF workflow after you finish preparing them.